


Let’s make some Easter treats. To be honest, it doesn’t have to be Easter for these sweeties to be made in my house! Did you know that you can make a healthier version of the well known peppermint patty? It’s so much better for you than the store-bought version…with no artificial flavoring, corn syrup, or other harmful ingredients. You can even adjust the sweetness to your liking. Move over store-bought peppermint patties, there’s a better homemade option in town!
Making peppermint patties at home isn’t as difficult as you might think. Super simple to make, with ingredients you probably already have in your pantry. They are cool and creamy, coated in dark chocolate…and I’m sure they won’t last in your freezer for more than a couple of days…wink, wink.
All photos by Nathalie Krull
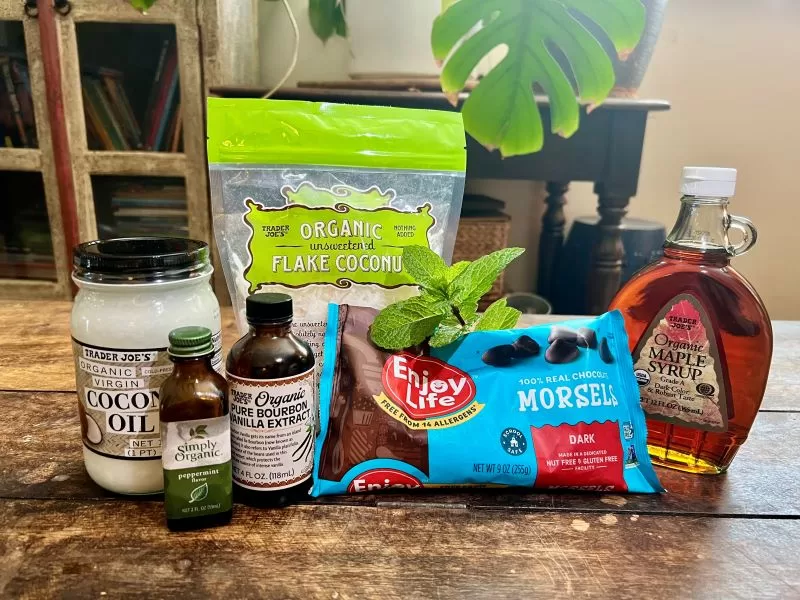
Ingredient List:
3 cups shredded coconut
2 tablespoons coconut oil plus 2 more tablespoons to add to the melted chocolate
3-6 tablespoons maple syrup…add to your desired sweetness
½- ¾ teaspoon peppermint extract… depending on your taste
1 teaspoon vanilla extract (optional…but really, doesn’t everything taste better with a splash?)
1 cup dark chocolate – I used vegan, allergy free chocolate chips, but you can use any type of chocolate you choose… bars, blocks, bunnies
Here we go…
Add the shredded coconut, 2 tablespoons coconut oil, maple syrup, peppermint extract, and vanilla extract (optional) to a food processor. Blend for approximately 5 minutes, stopping to scrape down the sides every so often. You want it to turn into a dough like consistency, the smoother the better.
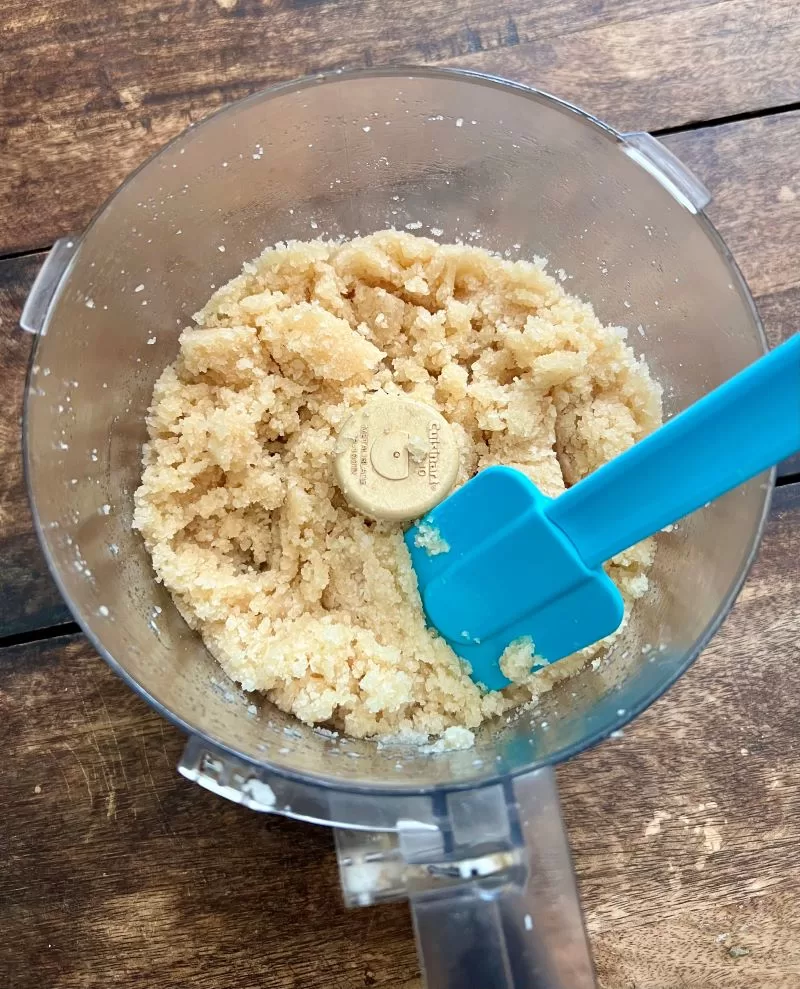
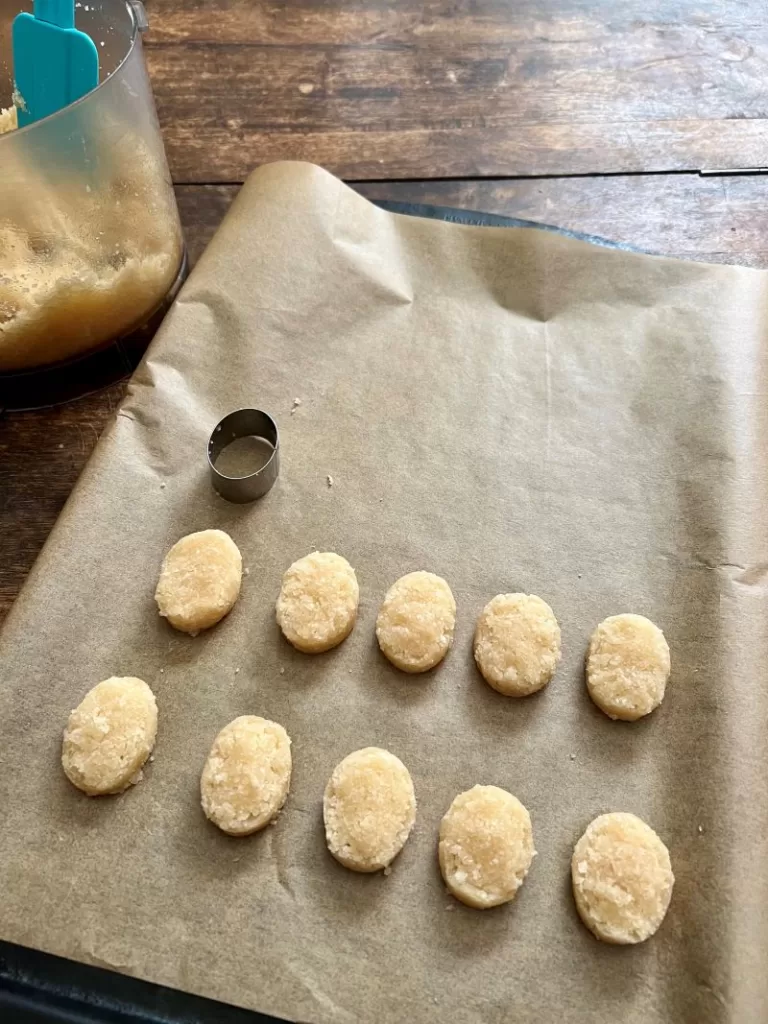
A food processor is very helpful to chop and mix the shredded coconut to a
dough-like consistency. With the help of a cookie cutter (or the lid of a spice
jar) the mixture can be formed into egg-shaped or circular patties
Next, line a baking sheet that fits in your freezer with parchment paper. You can use your hands to form little patty shapes from the dough, or if you happen to have an oval cookie cutter like I do, you can make little egg shapes. I have also found that you can use the lid of a spice bottle… Fill it up with the blended ingredients, tap it on its side, and the patties should pop right out. When you finish making all your patties, place them in the freezer for 15 minutes or longer.
While the patties are freezing, prepare your melted chocolate. Place the chocolate and 2 tablespoons coconut oil in a double boiler, also known as a water bath. To make your own double boiler, set a tempered glass or stainless steel mixing bowl over a saucepan of simmering water. The double boiler is great for delicate ingredients like chocolate, that would normally have a tendency to seize or separate over direct heat.
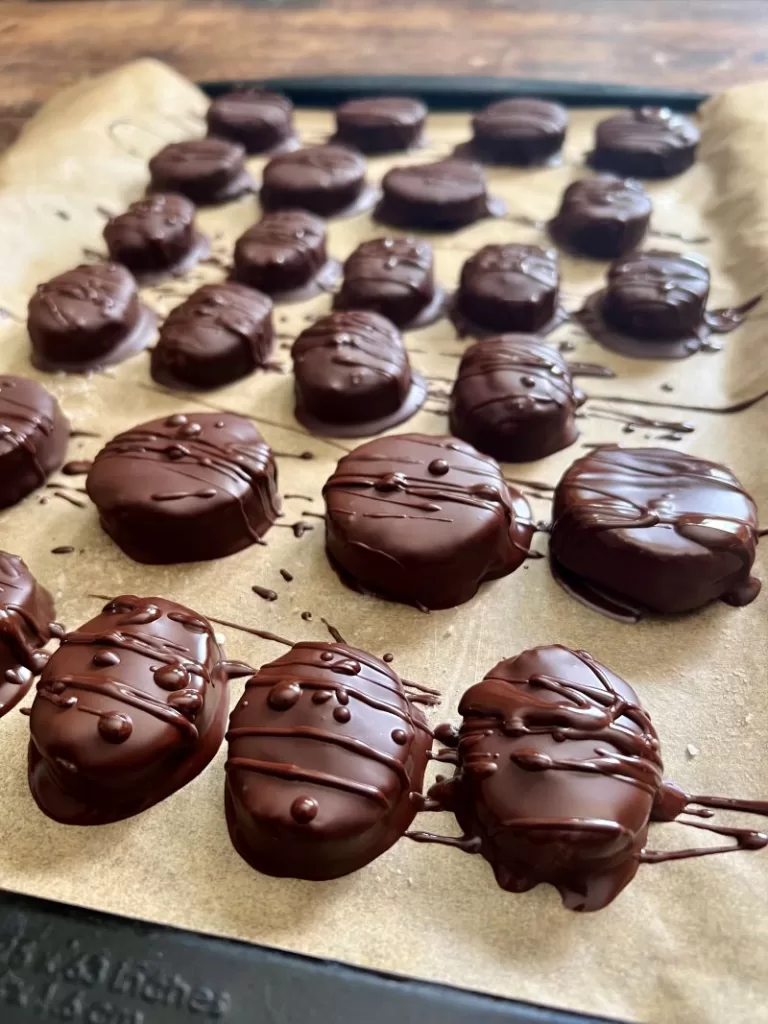
Once the chocolate and coconut oil is completely melted, I like to let it sit for approx. 5-10 minutes to cool down, and thicken up a bit. It should still be liquid, but you get a thicker shell if you let it cool a little first. You’re almost done… remove the frozen patties from the freezer, dip them in the melted chocolate, and place them back on the parchment paper lined baking sheet. If you have a little bit of extra melted chocolate left over after dipping every piece, you can drizzle it over all of the patties, creating a little splash art.
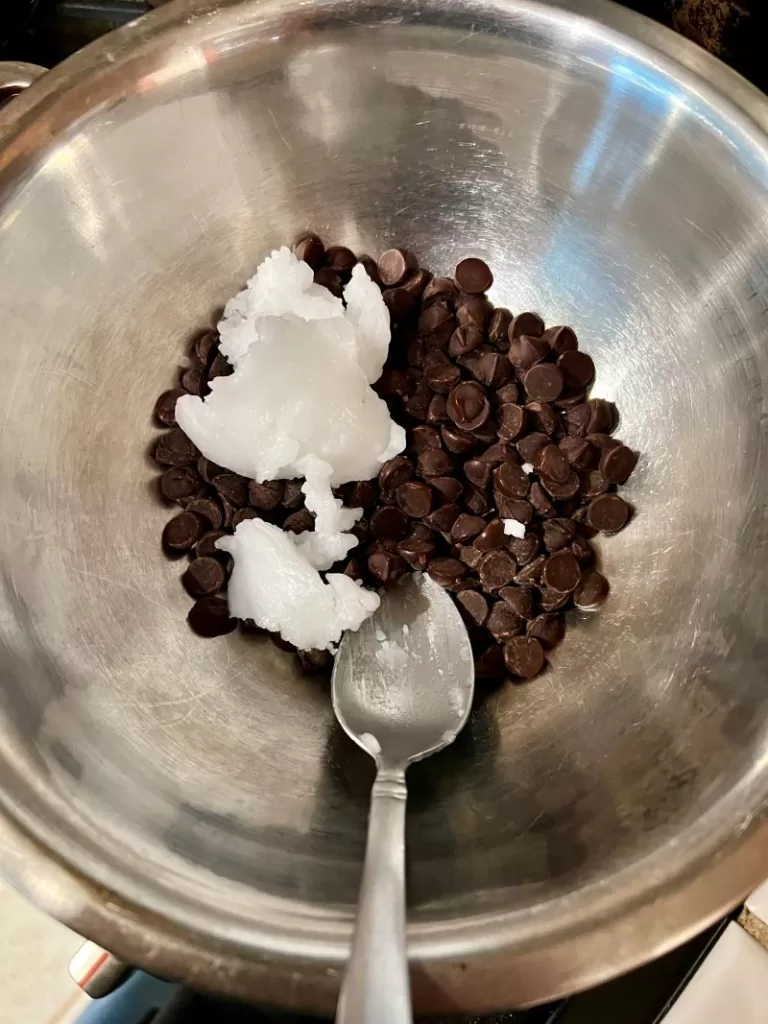
Creating a water bath—putting a heatproof bowl or small pan into a
simmering pot of water—helps to melt the chocolate gently instead of
against direct heat. The warm liquid coats the patties with a chocolate shell.
Place the chocolate-dipped patties back in the freezer, and try to control yourself for the next 15-20 minutes. Once you sink your teeth into these babies, there’s no going back. The dreamy creamy, minty taste paired with the chocolate is something you didn’t even know you were missing, until you have it. I hope you love them just as much as my family and I do! Good luck on your cooking adventures!


")